 |||
|||
If you are like me and you need a process for continuous integration and deployment for mobile apps on iOS, Android and Windows then this series of posts might help.
I tend to use a slightly custom version of Gitflow for new projects. Typically I’d have 3 permanent branches as follows:
Developers will create feature branches of develop. They work on this feature branch as long as they need to. They can also rebase onto develop when they need to get latest changes from develop in their branch. After they complete the feature, the developers do a final rebase onto develop to put their changes on top of develop (for easy and linear merging back into develop). They push changes to the origin (i.e VSTS git repo) and send a pull request or just an email to the code reviewer.
The reviewer will either tell the developer to fix something or merge (Fast forward) into develop. After a successful merge the feature branch is deleted from origin by reviewer and an email is sent to dev team to remove that branch if someone has it checked out locally. The dev team will also need do a git fetch and prune to clean up the deleted branches.
Finally once a week some team member will merge develop with beta that triggers a build and deployment to the HockeyApp for internal beta testing.
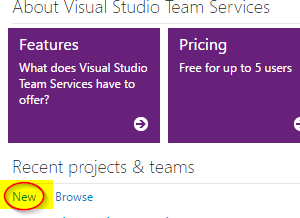
If you are new to VSTS and don’t know how to create a new project, follow this link to create the project in Visual studio team services.
Handy Tip: To create a new project.
Add name of the project, we’d use process template as ‘Scrum’ & version control as ‘GIT’.
By default VSTS comes with 2 built-in agents.
Build agents are the work horses of a build system and they compile the platform code into executables like ipa, apk etc. To build ios apps you need a build agent that can run on OSX and has all the correct tooling installed (XCode etc.)
I use the default agent for building iOS applications using a service called macincloud.com. As the name suggests it is an online service that is pre-configured with all required tooling to build Xamarin.iOS apps. It is a paid service, but worth every cent as it integrates well with VSTS. Follow the instruction here to setup macinclod with VSTS account. Upon successful setup this will start showing up as the Default agent in the VSTS under settings > Agent Queues.
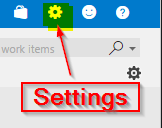
Handy Tip: Settings is the gear icon in the top right corner of the screen.
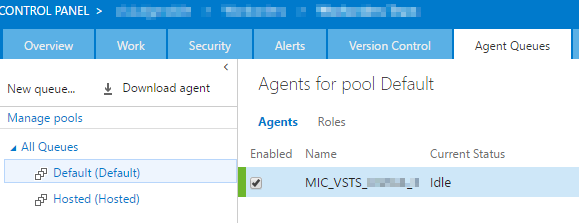
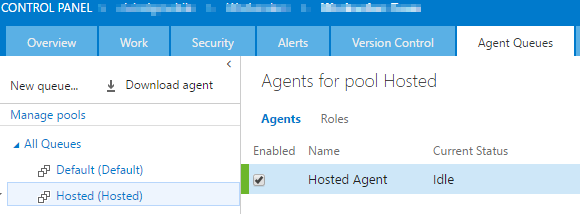
The green tick next to the agents indicate they the agent is available for builds.
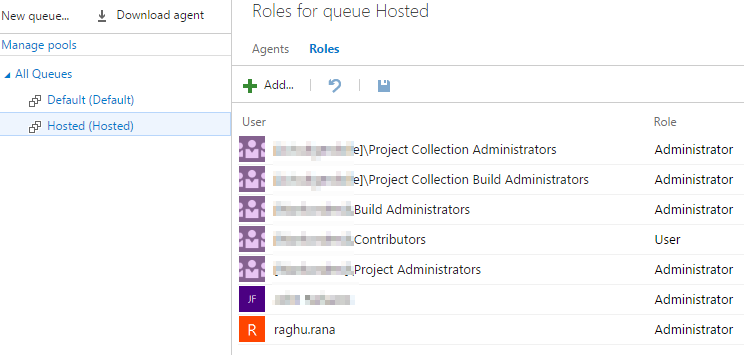
Important: Make sure to add yourself as an Administrator in the Roles tab next to Agents for both agents.
The next step is to get the code solution into VSTS Git repository. Follow this link for steps on how to do this. Once the code is committed and pushed to origin, it will be visible under the CODE menu. The next step is to switch over the BUILD tab and start adding some build definitions.
\Before we add any build steps, we need to configure a few things.
Before adding the first build step, it is worthwhile noting that the solution needs to be split into 3 separate sub solutions. This makes it easy for VSTS to build the 3 platforms separately on different hosts (Default and Hosted). We’ll still need the original solution, this is what the developers will open locally when they are working with Visual studio and it will load all projects.
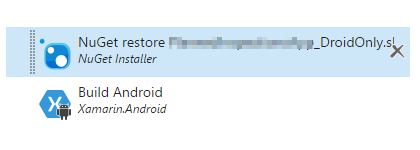
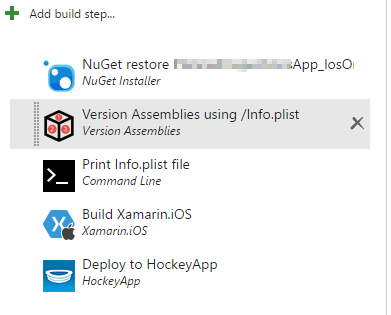
Click the + Add Build step button to get started
| Field Name | Field Value |
|---|---|
| Path to solution | Path to ios only solution |
| Path to Nuget.config | [Custom Nuget File].config |
A custom nuget file could be needed if you need multiple sources outside of Nuget to fetch some private libraries. In our case we had some private enterprise libs that our code depends on. Below is a sample of such a file. Place this file at the same level as the solution in your file explorer.
<?xml version="1.0" encoding="utf-8"?>
<configuration>
  <packageRestore>
    <add key="enabled" value="True" />
    <add key="automatic" value="True" />
  </packageRestore>
  <packageSources>
    <clear />
    <add key="nuget.org" value="https://www.nuget.org/api/v2" />

    <!-- change this to your project feed. -->
    <add key="MyGetFeed" value="https://www.myget.org/path/guid/api/v2" />
  </packageSources>
  <disabledPackageSources />
  <activePackageSource>
    <add key="All" value="(Aggregate source)" />
  </activePackageSource>
</configuration>| Field Name | Field Value |
|---|---|
| Installation Type | restore |
| Disable Local Cache | true |
| Field Name | Field Value |
|---|---|
| Solution | iosonly.sln |
| Configuration | Release |
| Create App Package | true |
| Build for iOS simulator | true |
Same as Develop branch
| Field Name | Field Value |
|---|---|
| Source Path | Path to the iOS csproj |
| File Pattern | /info.plist |
| Build Regex Pattern | \d+ |
Advanced tab
| Field Name | Field Value |
|---|---|
| Build Regex Group Index | 0 |
| Regex Replace Pattern | <key>CFBundleVersion(.|\n)*<string>\d+(?=<\/string>) |
| Prefix for Replacements | <key>CFBundleVersion</key><string> |
| Fail If no Target Match Found | true |
| Field Name | Field Value |
|---|---|
| Tool | cat |
| Arguments | Solution Folder/Project Folder/Info.plist |
| Field Name | Field Value |
|---|---|
| Solution | iosonly.sln |
| Configuration | $(BuildConfiguration).This is a build variable. Change this to release from ‘any cpu’ |
| Create App Package | true |
| Build for iOS Simulator | false |
Signing & Provisioning
Note: I typically create a folder called Build in the iOS project that contains all my mobileprovision and p12 certificates. This folder is referenced by this build step to compile iOS apps on macincloud.
| Field Name | Field Value |
|---|---|
| Override Using | File Contents |
| P12 Certificate File | Path to the p12 file in the solution build folder. |
| P12 Password | Your Password or use Secure Build Variable (click the lock icon next to the variable to make it secure) and reference here |
| Provisioning Profile File | Path to your mobileprovision file. |
Note: Typically you’d create 2 separate profiles. One for internal distribution within the organization (I typically call it HockeyApp profile) and one for putting the app on the store (I typically call it the store profile). For beta builds we’ll use the HockeyApp profile as we want to deploy to Hockey after a successful build.
| Field Name | Field Value |
|---|---|
| Remove Profile After Build | true |
To learn more about p12 and mobile provisioning profile, google “create p12 & mobileprovision files for iPhone”
Follow this tutorial to setup HockeyApp with VSTS
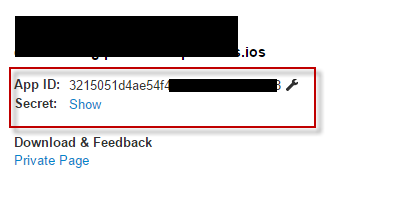
| Field Name | Field Value |
|---|---|
| AppId | Guid from HockeyApp project. If project does not exist, create one in hockey to get this ID. |
| Field Name | Field Value |
|---|---|
| Binary File Path | Path To Ios project/**/*.ipa |
| Symbols File Path | Path To Ios project/**/*.dSYM |
| Publish | true |
Same as the Beta branch
In the Appdelegate’s FinishedLaunching method of our iOS project, we read the HockeyId from a file called HockeyID.txt. This file lives in the build directory of the project as well. In order to change this to a different id, we use this build step to replace the contents of this file before the build is started. This shell script only has a single line of code:
sed -i "" 's/<Old HockeyID here>/<New HockeyId here>/g' HockeyID.txt
The configuration for this step is as follows:
| Field Name | Field Value |
|---|---|
| Script Path | Path to .sh script in the Build directory of the project |
Advanced Tab
| Field Name | Field Value |
|---|---|
| Specify Working Directory | true |
| Woking Directory | Path to ios Build folder. |
Same as beta branch
Same as beta branch
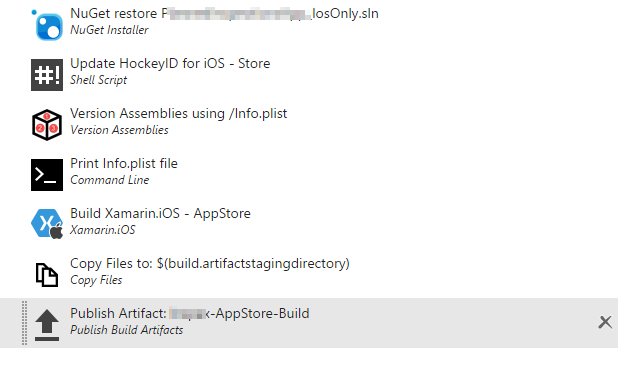
Same as beta branch, except the provisioning profile changes to the Apple store profile instead of the Hockey profile.
| Field Name | Field Value |
|---|---|
| Source Folder | Path to ios project folder |
| Contents | **/*.ipa |
| Target Folder | $(build.artifactstagingdirectory) |
| Advanced > Clear Target Folder | true |
| Field Name | Field Value |
|---|---|
| Path to Publish | $(build.artifactstagingdirectory) |
| Artifact Name | AppStore-Build |
| Artifact Type | Server |
Lastly, an optional build definition can also be created for the ios-store-hockey configuration. This is useful in scenarios when you have to fix a bug in some existing production code in the master branch. In this definition all the build steps are exactly the same as the beta ios build definition with the only exception of a different app id in the Deploy to hockey step.
For further information on provisioning profiles checkout this link on Xamarin’s website.